
Always had this love-hate relationship with my homelab. It all started with VMware ESXi as my host OS — life was good… until it wasn’t, hardware change. Then I went and treated myself to an Asus MiniPC with an AMD Ryzen 7 and that one special Realtek NIC that apparently hates stability as much as I hate random kernel panics as there is no driver available with any version of Vmware ESXI at all, so needed to custom build the VMware ESXI ISO. 😩
After countless issues, tantrums, and late-night “why won’t you just work?!” moments, I finally waved the white flag and moved to Proxmox. And boy, after a dozen hiccups, tweaks, and maybe a small sacrifice to the homelab gods, I think I’ve finally achieved nirvana.
So, before I mess it all up again, here’s my guide — partly for future-me, partly for anyone else on this wild ride.
Step 1: Grab the latest version of Proxmox from 👉 Proxmox Downloads
Step 2: Follow the install process and let it boot.
Step 3: Once rebooted and system is up. SSH and login to the root shell.
Step 4: Install ProxMenux and The Ultimate Updater. Two wonderful piece of tool for ProxMox super easy management and update. Use following command to install both.
bash -c "$(wget -qLO - https://raw.githubusercontent.com/MacRimi/ProxMenux/main/install_proxmenux.sh)" && bash <(curl -s https://raw.githubusercontent.com/BassT23/Proxmox/master/install.sh)Step 5: Reboot the system. Once done, login to shell again and type menu. It will show an interface like following:
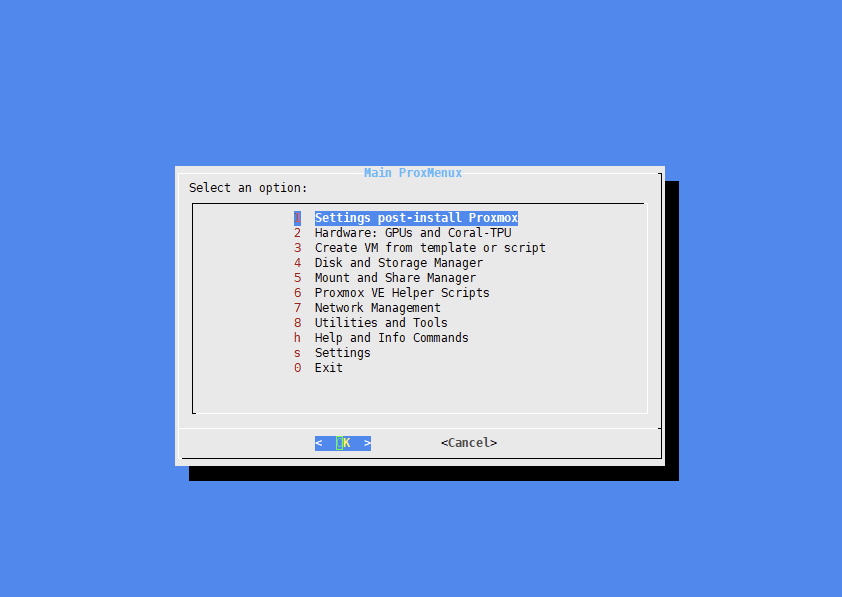
Choose option 1 first – >Then choose option 2 "Automated post-installation script."
Step 6: Go Back and then Choose option 8 "Utilities and Tools" --> then choose option 2 "System Utilities Installer" - install all tools.
Step 7: Install Processor Microcode using following command
bash -c "$(curl -fsSL https://raw.githubusercontent.com/community-scripts/ProxmoxVE/main/tools/pve/microcode.sh)"
Step 8: Install pv , it will help you later on.
apt install pvLastly - reboot the host once and you are ready with stable ProxMox host box.
Once reboot done, you can try to run The Ultimate Updater which is already installed. If VMs running qemu agent and supported OS, it will not only update the proxmox nodes, also all the supported VMs and LXC guests.
Command:
updateBonus :
To enable qemu agent on Debian based VMs login to VM and run following.
sudo apt -y install qemu-guest-agent
sudo systemctl enable qemu-guest-agent && sudo systemctl start qemu-guest-agent